In order to make use of the data you already have in your Oracle Enterprise Manager (OEM) in Oracle’s Management Cloud (OMC) you need to install and configure the OMC’s Data Collector agent.
Here’s how you do it.
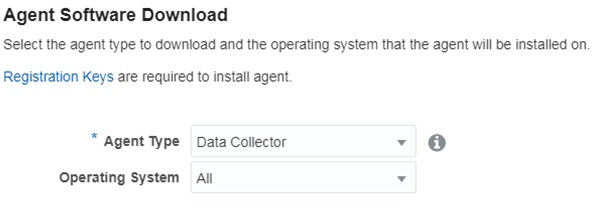
Login to OMC and navigate to Administration -> Agents -> Download
In the Agent Type box, select Data Collector.
Select the desired Operating System version. In my case is Linux 64 bit.
Once the agent is downloaded, take a note in the same OMC’s web page of the TENANT_ID and the UPLOAD_ROOT values.
Next login to the server hosting your OEM Repository database.
Create a directory in a place where you have enough space (3GB).
$ cd /u01/agent
$ mkdir omc
$ cd omc
Transfer the downloaded file to this new directory and unzip it.
$ ls
datacollector_linux.x64_1.23.0.zip
$ unzip datacollector_linux.x64_1.23.0.zip
Archive: datacollector_linux.x64_1.23.0.zip
inflating: unzip
inflating: AgentDeployment.sh
inflating: agentimage.properties
inflating: agent.rsp
inflating: agent_software_build.xml
extracting: agentcoreimage.zip
inflating: AgentInstall.sh
Modify the response file adding the required values. This step depends in whether you’re using a Gateway or a Proxy to connect to the OMC.
$ vi agent.rsp
All required values can be found here.
Now execute the installation.
$ ./AgentInstall.sh
Unzipping agent software, this may take some time…
Installing Data Collector…
Data Collector parameter validation started…
Skipping Data Collector pre-requisite checks as IGNORE_VALIDATIONS is set to true…
Data Collector base directory creation started…
Security artifacts download started…
Data Collector setup started…
Registering Data Collector…
Starting Data Collector…
Data Collector started.
Data Collector installation completed.
The following configuration scripts need to be executed as the root user:
/bin/sh /u01/agent/omc/datacollector/core/1.23.0/root.sh
You now need to execute the configuration script as root.
Once this is executed, go and verify the Data Collector agent is up and running.
$ cd /u01/agent/omc/datacollector/agent_inst/bin
./omcli status agent
Oracle Management Cloud Data Collector
Copyright (c) 1996, 2017 Oracle Corporation. All rights reserved.
—————————————————————
Version : 1.23.0
…
Started at : 2017-04-07 11:45:04
Started by user : oracle
Operating System : Linux version 4.1.17-12.3.5.el6uek.x86_64 (amd64)
Data Collector enabled : true
Sender Status : FUNCTIONAL
Gateway Upload Status : FUNCTIONAL
Last successful upload : 2017-04-07 11:46:28
Last attempted upload : 2017-04-07 11:46:27
Pending Files (MB) : 2.26
Pending Files : 80
Backoff Expiration : (none)
—————————————————————
Agent is Running and Ready
Verify the OMC’s Data Collector in the OMC console.
Navigate to Agents -> Administration -> Data Collectors
In this page you should see your newly installed Data Collector Agent.
Thanks,
Alfredo